Categories
Programming

Islands.swift

Back in undergrad, I did a lot of programming challenges – the sort of thing that shows up as a somewhat-contrived question in an interview. Great way to learn about automated testing, though, as in a school environment it’s basically an automated test suite where you aren’t allowed to see the tests.1

I’ve been wanting to brush up on algorithms a bit, and figured this would be a good way to do it. This time around, though, I’m using Swift; C++ was a fine language to learn, but I have exactly no desire to use it anymore.

So, the first problem I found whilst aimlessly googling was “Islands”. Given a grid of some sort (could be [[Bool]], although in this case I’ve done one as [[Character]], with '1' and '0' being the inputs2), count the number of islands in it.

An island, in this case, is any contiguous collection of '1' is in the grid, while all the the '0's are ocean.

Step One: Ask Questions

First question: what does ‘contiguous’ mean? Can we move diagonally, or only in the four cardinal directions?

Only the four cardinal directions, in this example.

Alright. Next, what happens at the edges? Do we Asteroids-style loop around, or is it just ‘out of bounds == ocean’?

Out of bounds is ocean.

Excellent! Means we don’t have any literal edge cases.

Final question before I start actually digging into the problem, how are we hooking into the test case?

protocol Islands {
  func numIslands(_ grid: [[Character]]) -> Int
}

Alright, simple enough. Let’s get cracking.

Step Two: Brainstorm

My first thought upon seeing a grid is “flood fill.” Now, this isn’t quite a flood fill, because the whole point is that it’s not all interconnected, but that at least gives me a starting point – for a flood fill, you want recursion. And you want to remember where you’ve been, so you can make a base case – otherwise, you’ll just loop forever. O(infinity) isn’t really ideal.

So, what’s the actual algorithm here?

Simple enough: for each point on the grid, check if it’s part of a new island. If it is, add one to our count of islands; if it isn’t, don’t. Move on to the next point on the grid.

Now, how do we check if it’s a new island? Also pretty simple: check if we’ve been here before; if we have, it’s not a new island. Then check if it’s an island; if it isn’t, it’s also not a new island. And, now that we know it’s a new island, we go recursive – mark that we’ve been to this spot, and flood fill our way across the neighboring tiles on the grid until we run out of island.

Step Three: Code

class Solution: Islands {
    private var visited: [[Bool]] = [] // (1)
    private var grid: [[Character]] = [] // (2)
    
    @discardableResult
    private func isNewIsland(x: Int, y: Int) -> Bool { // (3)
        guard x >= 0 else { return false }
        guard y >= 0 else { return false }
        guard x < grid.count else { return false }
        guard y < grid[0].count else { return false }
        if (visited[x][y]) { return false } 
        visited[x][y] = true
        if (grid[x][y] == "1") {
            // visit all neighbors
            isNewIsland(x: x+1, y: y)
            isNewIsland(x: x-1, y: y)
            isNewIsland(x: x, y: y+1)
            isNewIsland(x: x, y: y-1)
            return true
        } else {
            return false
        }
    }
    
    func numIslands(_ grid: [[Character]]) -> Int { // (4) 
        // precondition checks
        guard grid.count > 0 else {
            return 0
        }
        guard grid[0].count > 0 else {
            return 0
        }
        // reset visited state
        let subItem = Array<Bool>(repeating: false, count: grid[0].count)
        self.visited = Array<Array<Bool>>(repeating: subItem, count: grid.count)
        self.grid = grid
        var islandCount = 0
        for i in 0..<grid.count {
            for j in 0..<grid[i].count {
                if isNewIsland(x: i, y: j) {
                    islandCount = islandCount + 1
                }
            }
        }
        return islandCount
    }
}

Let’s go through this bit by bit.

  1. visited is key – we need to know where we’ve been. Unlike the folks making the problem statement, I actually know what my data type is – [[Bool]]
  2. This… is mostly for ease of passing it around. While I could write up my isNewIsland function in a purely-functional sense, with it taking in the coordinates, visited state, and grid, and then outputting the result… well, that’s kinda silly, really.
  3. isNewIsland is the bulk of the work. Let’s go through it.
    • The first four lines are checking that we’ve got valid input. This saves us from needing to check the range every time we call the method; if we try to do something that we can’t, it’ll just return false. Admittedly, I’m not checking that the grid properly exists before using it, but that’s what private is for – this is an implementation detail.
    • Next, check if we’ve visited this spot before. If we have, we’re done – it’s not a new island!
    • Before we go any further, mark this spot as visited! Important, because we may be recursing shortly, and we don’t want to get caught in an infinite loop.
    • Check if this is an island at all. If it isn’t, we’re done – this wasn’t a new island. If it is, though, we recurse. This is where the @discardableResult comes in – since we’ve got an early bail-out for “we’ve already visited this spot”, we know we’ll never be checking the same island twice, so we actually don’t care about the result of checking the neighboring spaces, we just need it to happen… so that they get marked as visited. And after we’re done marking the whole island as visited, we can finally return true, telling the caller (if they’re listening!) that this was a new island.
  4. Finally, our implementation of numIslands. Mostly it’s just checking for valid inputs – Swift can enforce at compile-time that nobody tries to pass us anything completely the wrong type, but it can’t force people to give us a grid with dimensions greater than 0 in either direction, so we need to check that ourselves. After that, we set up our visited as all-false, copy the grid, and loop through it, counting up our islands.
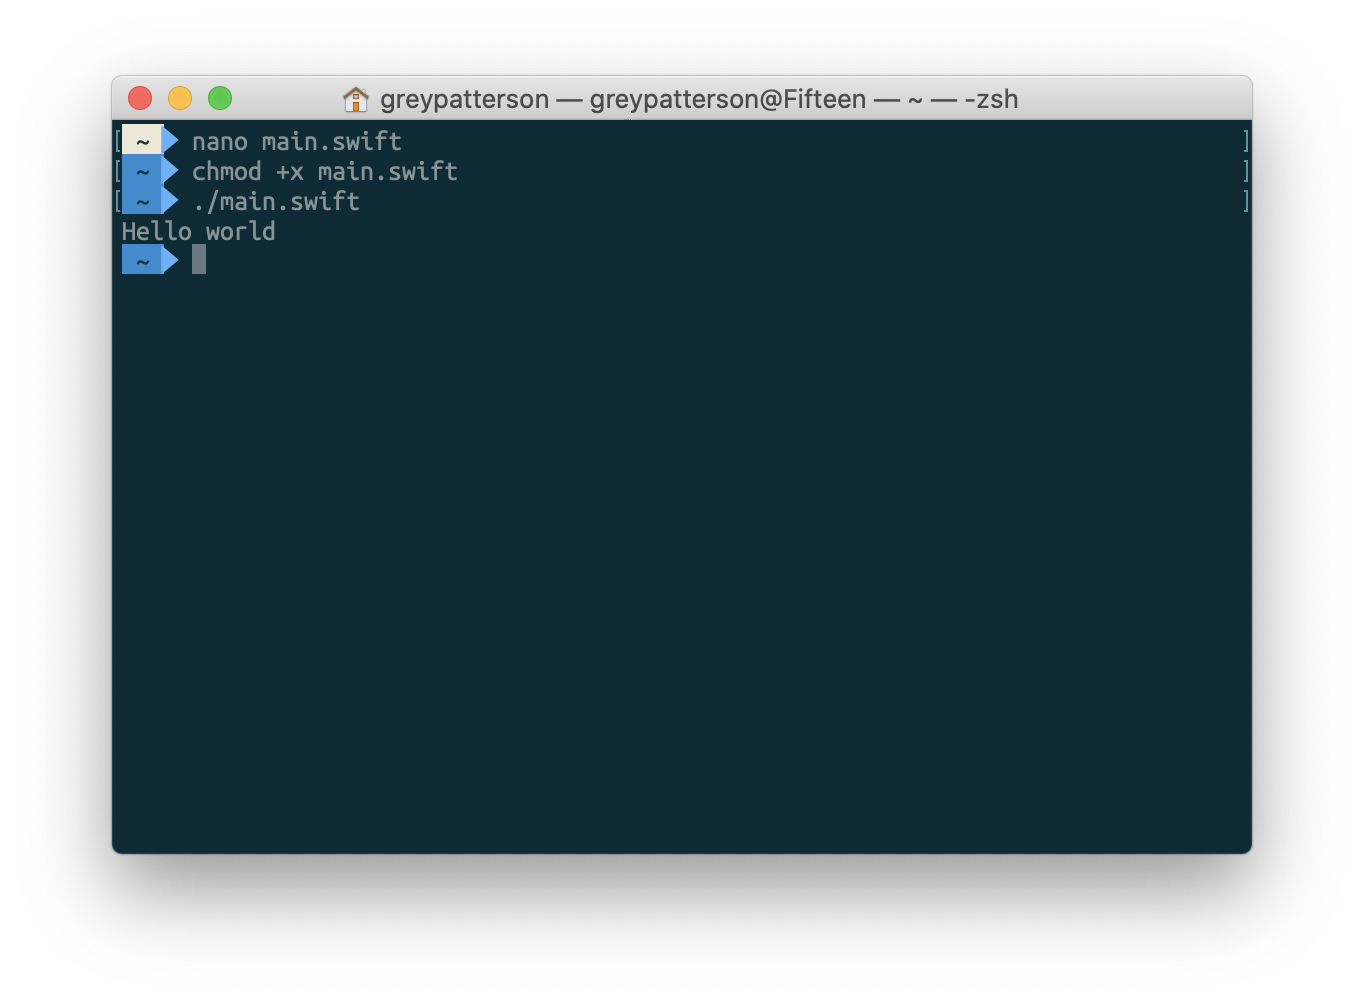
Step Four: Test

This part, I will mostly leave to your imagination; for myself, I just hit ‘run’ and let the automated tests do their thing. In an interview, Step Two should also include coming up with some test cases and running through them on your pseudo code – and remember to include one or two invalid inputs!

After that, if your tests pass, you could talk about changes you might make. Given my numerous remarks about [[Character]] instead of [[Boolean]], my thought would be to make it generic – have a grid of [[T]] and take a (T) -> Bool closure that tells you whether or not a grid point is an island. I’d also want to comment up the code a bit more, which I’ve neglected to do in this case as I’m writing a blog post around it instead.

Now, having already spoiled the answer, I’ll go ahead and mention that I tried this out at LeetCode; while this one may not be the most fun for you in the immediate wake of my explainer, they’ve got plenty of other solutions you could take a crack at, and a variety of languages to use. Give it a go, it’s kinda fun!

  1. Basically, the inverse of an “opaque box” analysis, if you think about it.
  2. And by “I’ve done one” I mean “the site that gave the example,” because I… wouldn’t use [[Character]] to represent a [[Bool]].
Categories
Programming

Dev Blogs

I recently had someone ask for recommendations for dev blogs to fill out their RSS reader. After going through what I have in my RSS reader, I realized that this would make a good little post—these have all been helpful resources to me, so it seems likely they could be helpful to someone else. (I have also been informed by a friend of mine that I should include myself in this list, but I figure you’re already here. Go ahead and throw this site URL into your RSS reader, the feed is nice and discoverable.)

So, in no particular order, developer blogs:

  • Use Your Loaf posts fun little things, usually regarding iOS development.
  • The Always Right Institute does terrible, terrible things with Swift, and they’re consistently a delight to read.
  • SwiftLee writes very solid articles explaining various Swift language features, iOS API things, and general career tips.
  • Swift with Majid does weekly deep dives into SwiftUI… and may or may not be the inspiration for my recent spate of programming posts.
  • Swift by Sundell is one of the definitive Swift sites; not only does John Sundell write up plenty of great articles (see ‘Swift Fundamentals’ as a great starting point!), he also has a couple podcasts, if listening is more your style.
  • Reda Lemeden does some fun explorations of Swift, as well as more general things with his “This Week I Learned” posts.
  • Gui Rambo does some really neat explorations of what’s possible on iOS when he’s not cracking open the developer betas to see what features Apple forgot to feature-flag out of the build.
  • Povilas Staškus hasn’t posted in a while, but his posts are worth a back-read; the Jekyll-to-Publish migration was a fun one. And, hey, putting an infrequent poster in RSS is what RSS is for!
  • NSHipster is a venerable name in the iOS dev world; not as actively updated as it once was, but the back catalog is extremely solid, and will quite often be one of the first results when Googling various things.
  • Kristaps Grinbergs writes in a similar vein to Swift with Majid, with explanations of various parts of the SwiftUI API.
  • Julia Evans is a break from my very iOS-heavy list so far; she does comics and zines explaining general programming concepts, command line tools, and all sorts of stuff. Seriously good explanations, I recommend checking them out.
  • Brent Simmons blogs about NetNewsWire, life as a developer, and neat bits of history in the Apple world.
  • Steven Troughton-Smith may well be the expert on Catalyst apps; his recent post of various sample apps is a wonderful resource if you’re looking into bringing an iPad app to macOS.
  • Erica Sadun’s blog has recently been a lot of neat macOS automation stuff; she’s also a frequent contributor to Swift itself.
  • On Hacking With Swift, Paul Hudson provides excellent WWDC coverage and an amazing array of tutorials and documentation.1 If you’re just getting started, go through his free 100 Days of Swift and 100 Days of SwiftUI courses.

And, in addition to all those blogs, I also funnel email newsletters into RSS whenever possible. My top picks from that list are:

  • iOS Goodies provides a little commentary with a list of articles.
  • iOS Dev Weekly comes with much more commentary; I’m also a fan of the “and finally…” section, it’s a nice ending every week.
  1. Seriously, it’s so robust that one of my top bangs is !hws
Categories
Programming

Network Caching With Combine

I’m going to lead in to this post by saying that this isn’t a Definitively Correct way to do this; it works for my use case, but has some definitive issues. Still, in the interest of transparency—and not running out of content for this blog—I’m going to share it anyways.

Last week, I shared a fun little enum-based way of representing API endpoints in a type-safe manner. It’s also pretty easy to expand on to use as the key for an in-memory cache of endpoint results.

(This, by the by, is Caveat 1: it’s a purely in-memory cache, with nothing being persisted to disk. User quits out of your app? Cache is gone. For what I’m working on, though, this is the behavior we want, so it works well.)

Let’s get started with the actual API surface we want:

class ApiClient {
	func get<T: Decodable>(endpoint: Endpoint, reset: Bool = false) -> T? {
		...
	}
}

Now, the funky thing about how I’ve got this implemented is that this get method is idempotent – if you call it 10,000 times for the same Endpoint, it’s only going to spit out one network request, and will just continue returning nil until something is actually present. (Well, unless you’re setting reset to true – that’s really in there for debug purposes more than anything else. Give the API I’m using on this project, it’s almost never necessary.)

And, for use with SwiftUI, we want it to be called again when the network request finishes, so we’ll make it an ObservableObject.

Next, let’s work out how to store things to achieve that. The main thing we need is somewhere to store the network requests, and somewhere to store the results – the aforementioned in-memory cache. And, to get that “call the method again when the cache changes” behavior, we can make it @Published:

class ApiClient: ObservableObject {
	private var loaders: [Endpoint:AnyCancellable] = [:]
	@Published private var cache: [Endpoint:Decodable] = [:]
}

Now, to make Endpoint we need it to be viable dictionary key, which is pretty easy to accomplish:

extension Endpoint: Hashable { }

Finally, we need to implement the actual method. Without further ado:

class ApiClient: ObservableObject {
	private var loaders: [Endpoint:AnyCancellable] = [:]
	@Published private var cache: [Endpoint:Decodable] = [:]
	
	func get<T: Decodable>(endpoint: Endpoint, reset: Bool = false) -> T? {
		if reset {
			cache[endpoint] = nil
			loaders[endpoint] = nil // which implicitly calls loaders[endpoint]?.cancel(), via the deinit
		}
		if let _item = cache[endpoint], let item = _item as? T {
			print("\(endpoint): cache hit")
			return item
		}
		if loaders[endpoint] == nil {
			print("\(endpoint): cache miss; beginning load")
			loaders[endpoint] = URLSession.shared.dataTaskPublisher(for: endpoint.url) // 1
				.map(\.data)
				.decode(type: T.self, decoder: JSONDecoder()) // 2
				.receive(on: DispatchQueue.main)
				.sink(receiveCompletion: { (completion) in 
					print(completion)
				}, receiveValue: { (item) in 
					self.cache[endpoint] = item
				})
		}
		print("\(endpoint): cache miss; loading already in progress")
		return nil
	}
}

Two notes in there:

  1. You may want to swap out the use of URLSession.shared here for a parameter into the class’ constructor – it’ll make your testing a bit easier.
  2. Even more so than (1), you probably want to swap out JSONDecoder() here for something stored on the class – that decoder isn’t free to initialize!

Now, as I mentioned, this has some limitations. The first one I already went over – it’s a purely in-memory cache. The second is at the call site – since this is generic across Decodable, you have to annotate at the call site what the expected return type is, which isn’t the most ergonomic.

My actual thought on fixing that was very TypeScript-inspired – creating overloads that specify T based on the given endpoint. In Swift, this isn’t too difficult, just adding something like:

extension ApiClient {
	func getCategory(_ id: Category.ID, reset: Bool = false) -> Category? {
		get<Category>(endpoint: .category(id), reset: reset)
	}
}

Which, of course, can get a bit repetitive depending on the number of endpoints you have. But hey, it works for my use case, and it may be helpful to someone else, so: blog post!

As a post-credits scene of sort, the TypeScript version is a bit silly, and takes advantage of the absolutely bonkers way method overloads work in TypeScript. I’ll throw out some pseudocode:

class ApiClient{
	func get(endpoint: Endpoint.Category, reset: bool): Category?
	func get<T>(endpoint: Endpoint, reset: bool: T? {
		...
	}
}

Yes, method overloads like this are just declaring the method multiple times before the actual body. And yes, you can specify an individual enum case as a type.

Categories
Programming

Safe API Calls with Enums

I really hate runtime errors. I’m a firm believer in the concept that as many errors as conceivably possible should be caught at compile-time. It makes sense, after all: a compile time error for me means a few minutes of my time spent fixing it; a runtime error for my users means a few seconds of their time staring at an error… multiplied across however many users there may be. And, really, how often are you working on an app where you outnumber the users?

In this vein, I’ve been tinkering with how to handle network requests. The easy first thing to do was to swap out stringly-typed URLs for an enum, and Swift’s associated values make this a breeze:

enum Endpoint {
	case globalConfiguration
	case category(Category.ID)
	case product(Product.ID)
	...
}

Your definitions may vary – this is, of course, very specific to the actual use case. But look at that – not only do we have clear representations of the various endpoints available, we can even link the variable components of those URLs to being the proper type for the model we expect to get back. How’s that for self-documenting code?

Next, we need a way to convert from this lovely enum to the actual URL we’re going to use to make our requests. I’ve split this up a little bit:

extension Endpoint {
	var pathComponents: String {
		switch self {
			case .globalConfiguration:
				return "/config.json"
			case .category(let ID):
				return "/category/\(ID).json"
			case .product(let ID):
				return "/product?id=\(ID)"
			...
		}
	}

	var url: URL {
		#if DEBUG
		return URL(string: "https://dev.my.app")!.appendingPathComponent(pathComponents)
		#else
		return URL(string: "https://api.my.app")!.appendingPathComponent(pathComponents)
		#endif
	}
}

Et voila, converting to our known URLs, and a nice little “automatically use the dev server in debug mode” check, while we’re at it.

Now, depending on how you’re organizing your networking code, we can tweak the API surface here a little bit to make things clearer. Add those extensions in the same file as the code that makes the network requests, and declare them fileprivate – and now, you’ve got an automatic reminder from the compiler if you start writing some URL-based networking code outside of the network component. No more leaky abstraction!

Categories
Programming

FocusedValue on tvOS

Alright, let’s set the scene with a mildly contrived example: you’ve got a list of things, and you want the surrounding View to match them. For a tvOS app, this could be swapping out the background and some title text to match the selected episode; since I don’t feel like coming up with some fake episode titles, however, we’re going to go with colors:

At first thought, you’d probably reach for @State, something akin to:

struct ColorsView: View {
	@State var selectedColor: Color
	let colors: [Color]

	var body: some View {
		VStack {
			Text(colorName(selectedColor))
			HStack {
				ForEach(colors) { color in 
					Rectangle().fill(color).focusable()
				}
			}
		}
			.background(WaveyShape().fill(selectedColor)
	}
}

Not too bad; attach on onFocus to the Rectangle() and it should work!

But… what if there’s more layers in between? Instead of a Rectangle(), you’ve got some other View in there, maybe doing some other logic and stuff.

Oof, now we’re going to need a @Binding, and – oh, what happens if the user swipes out of the rectangles and to our nav bar, can selectedColor be nil?

Happily, SwiftUI has something built out to handle basically this exact scenario: @FocusedValue. There’s some great tutorials out there on how to do this for a macOS app, which allows you to wire up the menu bar to respond to your selection, but it works just as well on tvOS.

Let’s get started:

struct FocusedColorKey: FocusedValueKey {
	typealias Value = Color
}

extension FocusedValues {
	var color: FocusedColorKey.Value? {
		get { self[FocusedColorKey.self] }
		set { self[FocusedSeriesKey.self] = newValue }
	}
}

Now we’ve got our new FocusedValue available, so let’s use it:

struct ColorsView: View {
	@FocusedValue(\.color) var selectedColor: Color?
	
	var body: some View {
		VStack {
			Text(colorName(selectedColor ?? Color.clear))
			HStack {
				ForEach(colors) { 
					ColorRectangleView(color: $0)
				}
			}
		}
			.background(WaveyShape().fill(selectedColor ?? Color.clear)
	}
}

The one big change here is that selectedColor can be nil. I’ve gone ahead and defaulted to .clear, but do what fits your use case.

Finally, we need to set the focused item:

struct ColorRectangleView: View {
	let color: Color

	var body: some View {
		Rectangle()
			.fill(color)
			.focusable()
			.focusedValue(\.color, color)
		}
	}
}

Et voila, it works!

Now, this may not seem like a huge change over doing it via @Binding, but keep in mind: @FocusedValue is a singleton. You can have every view in your app respond to this, without passing @Bindings every which way.

Categories
Programming

Position vs Offset

I’ve had reason recently to be doing custom position of things in SwiftUI, and figured I’d share something that I found a bit of a tricky distinction at first: position vs offset.

So, let’s set the scene:

struct DemoView: View {
	var body: some View {
		HStack {
			Rectangle().fill(.gray)
			Rectangle().fill(.blue)
			Rectangle().fill(.gray)
		}
	}
}

And now I’ll add some visuals, for ease of reading. (I made these in Sketch, so the graphics aren’t precisely what you’d get by running this code, but hey, artistic liberties.) Here’s our view:

Three squares in a row.

Now let’s tinker!

struct DemoView: View {
	var body: some View {
		HStack {
			Rectangle().fill(.gray)
			Rectangle().fill(.blue)
				.offset(x: 150, y:150)
			Rectangle().fill(.gray)
		}
	}
}

We’re offsetting the middle square. What does that look like?

Three squares; two are in a row, and there is a space in the middle where the third could fit, but it is below and to the right of that space.

I’ve left in a little ghost image to show where it was, because it’s an important distinction! As far as the HStack is concerned, that space is still occupied. Think of it like throwing your voice – you don’t move, just the perception of where you are.

Let’s try something else, now:

struct DemoView: View {
	var body: some View {
		HStack {
			Rectangle().fill(.gray)
			Rectangle().fill(.blue)
				.position(x: 150, y:150)
			Rectangle().fill(.gray)
		}
	}
}

Looks pretty similar in code, right? We’ve just swapped out ‘offset’ for ‘position’. What do we get on screen?

Three squares; two are in a row, while the third is out of alignment and slightly overlapping.

Ooh, very different! No more ghost, because now it’s actually in a different place – not holding that spot in the HStack. It’s also in a different spot than the previous one, what gives?

It’s in the name: ‘offset’ offsets the view from where it normally would’ve been. Our starting position was where the ghost stayed:

Three squares; two are in a row, and there is a space in the middle where the third could fit, but it is below and to the right of that space. The distance from the space to the square is labeled, with 150 in the top distance and 150 in the left distance.

‘Position,’ on the other hand, skips the whole question of where it would go and instead just puts it in an exact spot, using the top left corner of the screen as the point (0,0):

Three squares; two are in a row, while the third is out of alignment and slightly overlapping. The distance from the misaligned square to the top and left of the image are labeled with '150' on each.

The other approach that worked for my brain, coming from doing a lot of web dev, is to think about ‘offset’ as being CSS’ ‘position: relative’, while ‘position’ is equivalent to ‘position: absolute’.

Hopefully this helps the whole thing make sense!

Categories
Programming

Transitions in ZStacks

The other day, I found a fun little SwiftUI edge case: using a .transition() modifier in a ZStack doesn’t work. As a basic demo, let’s do something like this:

struct DemoView: View {
	@State var showing = true
	
	var body: some View {
		ZStack {
			Rectangle().fill(Color.red)
				.onTap {
					showing.toggle()
				}
			if (showing) {
				Text("Hello, world!")
					.transition(.opacity)
			}
		}
	}
}

Pretty simple example, yeah? Seems like it’d Just Work(TM) out of the box. It doesn’t, though; instead of a lovely opacity animation, it just pops in and out. Hmm.

Worry not, though, as I have a fix:

struct DemoView: View {
	@State var showing = true
	
	var body: some View {
		ZStack {
			Rectangle().fill(Color.red)
				.onTap {
					showing.toggle()
				}
				.zIndex(1)
			if (showing) {
				Text("Hello, world!")
					.transition(.opacity)
					.zIndex(2)
			}
		}
	}
}

Et voila, your transition works!

Now, I haven’t exactly done rigorous experimentation to figure out why, exactly, this works, but I do have a theory: when SwiftUI removes the Text, it loses its place in the ZStack, and gets assigned to “behind everything else.” By manually specifying the order, the slot stays reserved, and it can stay there while it fades in and out.

Categories
Programming

Playing Videos in SwiftUI

As of WWDC 2020, we have a way to play videos in SwiftUI without bailing out to UIKit with UIViewRepresentable. At first glance, it’s pretty simple, as well:

import SwiftUI
import AVKit

struct VideoPlayerView: View {
	let videoURL: URL

	var body: some View {
		let player = AVPlayer(url: videoURL)
		VideoPlayer(player: player)
	}
}

Et voila, you’re playing a video! You can overlay content on top of the video player pretty easily:

import SwiftUI
import AVKit

struct VideoPlayerView: View {
	let videoURL: URL

	var body: some View {
		let player = AVPlayer(url: videoURL)
		VideoPlayer(player: player) {
			Text("Watermark")
		}
	}
}

Seems like we’re good to go, no?

Well, not quite. Let’s talk memory management.

VideoPlayerView is a struct – it’s immutable. SwiftUI allows us to mutate the state of our views with user interaction using things like @State, thanks to some Compiler Magic.

Every time some aspect of the state changes, SwiftUI calls the body getter again.

Spotted the catch yet?

We’re declaring the AVPlayer instance inside the body getter. That means it gets reinitalized every time body gets called. Not the best for something that’s streaming a video file over a network.

But wait, we’ve already mentioned the Compiler Magic we can use to persist state: @State! Let’s try:

import SwiftUI
import AVKit

struct VideoPlayerView: View {
	let videoURL: URL
	@State var player = AVPlayer(url: videoURL)

	var body: some View {
		VideoPlayer(player: player)
	}
}

Whoops. We’ve got a problem – self isn’t available during initialization, so we can’t initialize the AVPlayer like that. Alright, we’ll write our own init:

import SwiftUI
import AVKit

struct VideoPlayerView: View {
	let videoURL: URL
	@State var player: AVPlayer

	init(videoURL: URL) {
		self.videoURL = videoURL
		self._player = State(initialValue: AVPlayer(url: videoURL))
	}

	var body: some View {
		VideoPlayer(player: player)
	}
}

(I suppose we could drop the let videoURL: URL there, since we’re using it immediately instead of needing to store it, but for consistency’s sake I’m leaving it in.)

Okay, sounds good – except, hang on, @State is only intended for use with structs, and if we peek at AVPlayer it’s a class.

Okay, no worries, that’s what @StateObject is for, one more tweak:

import SwiftUI
import AVKit

struct VideoPlayerView: View {
	let videoURL: URL
	@StateObject var player: AVPlayer

	init(videoURL: URL) {
		self.videoURL = videoURL
		self._player = StateObject(wrappedValue: AVPlayer(url: videoURL))
	}

	var body: some View {
		VideoPlayer(player: player)
	}
}

There, we should be good to go now, right? Right?

Alas, the compiler says no. AVPlayer doesn’t conform to ObservableObject, so we’re out of luck.

Fortunately, ObservableObject is pretty easy to conform to, and we can make our own wrapper.

import SwiftUI
import AVKit
import Combine

class PlayerHolder: ObservableObject {
	let player: AVPlayer
	init(videoURL: URL) {
		player = AVPlayer(url: videoURL)
	}
}

struct VideoPlayerView: View {
	let videoURL: URL
	@StateObject var playerHolder: PlayerHolder

	init(videoURL: URL) {
		self.videoURL = videoURL
		self._player = StateObject(wrappedValue: PlayerHolder(videoURL: videoURL))
	}

	var body: some View {
		VideoPlayer(player: playerHolder.player)
	}
}

Phew. At long last, we’ve got a stable way to hold onto a single AVPlayer instance. And, as a bonus, we can do stuff with that reference:

import SwiftUI
import AVKit
import Combine

class PlayerHolder: ObservableObject {
	let player: AVPlayer
	init(videoURL: URL) {
		player = AVPlayer(url: videoURL)
	}
}

struct VideoPlayerView: View {
	let videoURL: URL
	@StateObject var playerHolder: PlayerHolder

	init(videoURL: URL) {
		self.videoURL = videoURL
		self._player = StateObject(wrappedValue: PlayerHolder(videoURL: videoURL))
	}

	var body: some View {
		VideoPlayer(player: playerHolder.player)
			.onAppear {
				playerHolder.player.play()
			}
	}
}

Will start playing the video as soon as the view opens. Similarly, you could add some Buttons, build your own UI on top of the video player, all sorts of fun.

And, from the other end, you can put more logic in the PlayerHolder, as well. Say you need some additional logic to get from a video ID to the actual URL that the AVPlayer can handle? Try something like this:

class PlayerHolder: ObservableObject {
	@Published var player: AVPlayer? = nil
	init(videoID: Video.ID) {
		NetworkLayer.shared.lookupVideoInformation(videoID) { result in 
			self.player = AVPlayer(url: result.url)
		}
	}
}

(Now, that’s not the nice, Combine-y way to do it, but I’ll leave that as an exercise for the reader. Or possibly another post.)

Categories
Programming

tvOS Carousels in SwiftUI

It’s a fairly common pattern in tvOS apps to have a carousel of items that scrolls off screen in either direction – something vaguely like this:

Image a tvOS wireframe, showing two horizontally-scrolling carousels.

Actually implementing this in SwiftUI seems like it’d be easy to do at first:

VStack {
	Text("Section Title")
	ScrollView(.horizontal) { 
		HStack {
			ForEach(items) { 
				ItemCell(item: $0)
			}
		}
	}
}

Which gets you… a reasonable amount of the way there, but misses something: ScrollView clips the contents, and you wind up looking like this:

A tvOS wireframe, showing two horizontally-scrolling carousels; both have been clipped to the wrong visual size.

Not ideal. So, what’s the fix? Padding! Padding, and ignoring safe areas.

VStack {
	Text("Section Title").padding(.horizontal, 64)
	ScrollView(.horizontal) {
		HStack {
			ForEach(items) { 
				ItemCell(item: $0)
			}
		}
			.padding(64) // allows space for 'hover' effect
			.padding(.horizontal, 128)
	}
		.padding(-64)
}
	.edgesIgnoringSafeArea(.horizontal)

The edgesIgnoringSafeArea allows the ScrollView to expand out to the actual edges of the screen, instead of staying within the (generous) safe areas of tvOS.1

That done, we put the horizontal padding back in on the contents themselves, so that land roughly where we want them. (I’m using 128 as a guess; your numbers may vary, based on the design spec; if you want it to look like The Default, you can read pull the safe area insets off UIWindow.)

Finally, we balance padding on the HStack with negative padding on the ScrollView; this provides enough space for the ‘lift’ (and drop shadow, if you’re using it) within the ScrollView, while keeping everything at the same visual size.

  1. tvOS has large safe areas because TVs are a mess in regards to useable screen area.
Categories
Programming Tools

Playlister

In the past couple months, I’ve had an ongoing series on converting iTunes playlists to text files, with a brief digression into scripting with Swift. While I doubt that I’m entirely done with the topic, I have reached a point where I’m ready enough to do another write-up.
This morning, I made playlister available to the public. It is not a consumer-facing application like my others; it is very much a tool for people who are comfortable with the command line.
In between the previous iteration of this tool and the current, I actually had a version of playlister built and shareable (Chase has that version installed on his Mac, actually) but, before releasing it to the public, I looked at the code and thought “I can do better.”1
So I buckled down and spent some time indulging in my love for API design, and tried some tricks I’ve been wanting to try.
The rewritten version ships with a library, LibPlaylister, that provides the basic ideas — protocols that allow for interacting with the library, playlists, and tracks; conversion to Markdown — as well as some neat new tricks. There’s some hooks for customization, such as the RatingFormatter protocol, and included FiveStarRatingFormatter, and the new LinkStore protocol, which provides a layer of abstraction on the SQLite-based caching of links.2
It was also an excuse to add to my Swift toolbox. I worked with SwiftCLI for a while, and then converted to ArgumentParser when that was released. I’ve done file interactions, and a lightweight database. I’ve learned a lot about Swift Package Manager.3 I learned a bit about XCTest, and figured out how to get it working in GitHub Actions. (And, more interestingly, figured out how to conditionally include frameworks in an SPM package. I wanted the tests running on Linux, but Linux… doesn’t have the iTunesLibrary framework, shockingly.)
I had fun building this, and will probably continue to tweak it. (I mean, it could be fun to get it automatically pulling links from the iTunes Search API, and just asking ‘is this the right link?’ instead of requiring manual entry.4)
For now, though, it’s ready enough to share, and made for a fun write-up and a good way to de-stress by tinkering.


  1. Interesting aside from giving that to Chase: Did you know that macOS has a ‘quarantine’ flag it puts on executables sent via AirDrop? That was some fun googling to figure out. The solution: xattr -d com.apple.quarantine ./playlister 
  2. That caching is definitely the biggest productivity gain of this, as compared to the previous version — now, when I go to write up my monthly playlist, the whole first part of the playlist doesn’t require any interaction at all. 
  3. Coming from working with nom’s package.json format at work, SPM Package.swift files are nice. Like, you can have comments in them! And, more, you can have actual code, so you can do neat stuff like this
  4. Although, at that point, I’d probably wind up writing it up as a SwiftUI app so I can show images. Which… might have been part of the inspiration for making LibPlaylister a separate library. 
Categories
Programming

Relational Databases

Inspired by a mix of Julia Evans and how much fun I had last time, I threw together another sketchnote on the basics of relational databases.

Relational Databases: How we store data! They model relations between things. Databases have tables, which have rows and columns.  A column has one type of data, like CHAR, VARCHAR, and NVARCHAR for text, INT, BIGINT, FLOAT, and DOUBLE for numbers, BOOL for booleans, and DATETIME for dates and times. Columns can also be nullable, which basically means ‘optional.’ Having a single type of data per column allows databases to be very fast and efficient. Rows are the actual data in the database, and are also referred to as ‘records’ or ‘entries.’ Keys: a table has a column as its primary key. That means that each row has a unique value there, which you can use to identify the row. Kinda like a social security number, or your phone number - it’s uniquely yours! A foreign key is a value that is the primary key of another table. You can use it to reference a row in a different table.
(Obviously I’m skipping over a lot of detail, but as a very quick intro to what a relational database is, I think it works!)
Categories
Programming

SwiftUI’s Picker

I’m very excited about SwiftUI, and have been using what little free time I have to do some tinkering with it. I started during the beta period, which was fun in between being very frustrating; a lovely side effect was that some of the knowledge I picked up is… entirely wrong. One that caught me was the implementation details for the Picker type.
Based on the rather rough state of the SwiftUI documentation for Picker and ForEach,1 I’d assumed that combining the right binding with a .tag(_:) on the items would work:

Form {
    Picker(selection: $selectedItemID, label: Text("Choose Something") {
        ForEach(items){
            Text($0.label).tag($0.value)
        }
    }
    Text("You've selected item \(selectedItemID)!")
}

For reference, the models I’m referring to throughout are pretty simple:

struct CustomModel {
    let value: Int
    let label: String
}

Now this looks like it’s working in simple cases. However, I was trying to interact with a web API, so that items array looked something like this:

var items: CustomModel[] = [
    CustomModel(value: 7, label: "First"),
    CustomModel(value: 3, label: "Second"),
    CustomModel(value: 1, label: "Third")
]

If you tapped “Second” in the picker that SwiftUI generated, however, the text wouldn’t read “You’ve selected item 3!” like it should; it would be “You’ve selected item 1!”
A bit more tinkering revealed that, instead of pulling the value from the .tag(_:) on there, it was just using… the index in the ForEach.2
After some frustrated Googling, utterly despairing of Apple’s documentation, and a lot of StackOverflow searches, I finally figured out the solution:

Form {
    Picker(selection: $selectedItemID, label: Text("Choose Something") {
        ForEach(items, id: \.value){
            Text($0.label).tag($0.value)
        }
    }
    Text("You've selected item \(selectedItemID)!")
}

Quite frankly, I don’t have a good explanation of what’s going on here; last time I was tinkering with Pickers, the .tag(_:) provided SwiftUI with the information it needed to do the binding. (When I’ve got more time, I’d like to do another test — now that I’ve got the id keypath, do I even need the tag?)
I’d love a good explanation of what all the id keypath gets used for, and where else it might be necessary, but alas:


  1. It’s a bit unfair for me to link to No Overview Available when referring to SwiftUI; the coverage is low, but the problem isn’t so much that as the fact that ‘documentation coverage’ just doesn’t work as a metric for something like SwiftUI. The tutorials are a start, and a good sign that Apple was at least trying to rethink their approach to documentation, but they’re not nearly complete enough. 
  2. Zero-based index, of course, which seemed obvious to me, but got me a “???” response when I was complaining about this issue to a non-programmer friend. 
Categories
Programming Technology Tools

Automated Playlist Backup With Swift

I mentioned in my post about scripting with Swift that I’d been working on something that inspired this. Well, here’s what it was: a rewrite of my automated playlist backup AppleScript in Swift. That version ran every hour… ish. Partly that scheduling issue is because launchd doesn’t actually guarantee scheduling, just ‘roughly every n seconds’, and partly it’s because the AppleScript was slow.1
Then I found the iTunesLibrary API docs, such as it is, and thought “well, that’d be a much nicer way to do it.”
And then I remembered that Swift can be used as a scripting language, cracked my knuckles, and got to work. (I also had some lovely reference: I wrote up my very basic intro post, but this post goes further in depth on some of the concepts I touched on.)

https://gist.github.com/grey280/0126ac93df1d52d91e78f52d97805246

Not the best API I’ve ever written, but not bad for something I threw together in a few hours. And I had fun doing it, more so than I did with the AppleScript one.
Oh, and it’s much faster than the AppleScript equivalent: this runs through my ~100 playlists in under a minute. So now I have it run every 15 minutes.2
(The configuration for launchd is about the same, you just replace the /usr/bin/osascript with the path to the Swift file, and make the second argument the full path to the directory where you want your backups going. See the original post for the details.)
I’m a bit tempted to turn this into a macOS app, just so I can play around with SwiftUI on macOS, and make it a bit easier to use. Of course, by ‘a bit tempted’ I mean ‘I already started tinkering,’ but I doubt I’ll have anything to show for a while — near as I can tell, SwiftUI has no equivalent to NSOutlineView as of yet, which makes properly showing the list a challenge. Still, it’s been fun to play with.


  1. I was going to cite this lovely resource, but since that website was built by someone who doesn’t understand the concept of a URL, I can’t link to the relevant section. Click ‘Configuration,’ then the ‘Content’ thing that’s inexplicably sideways on the left side of the screen, and ‘StartInterval’ under ‘When to Start’. 
  2. I’m also looking at the FSEvents API to see how hard it would be to set it up to run whenever Music (née iTunes) updates a playlist, but that… probably won’t happen anytime soon. 
Categories
Programming Technology

Swift Scripting

I’m a bit of a fan of Swift, though I don’t get to tinker with it nearly as much as I’d like. Recently, though, I did some tinkering with Swift as a scripting language, and thought it was pretty fun! (I’m planning another blog post about what, exactly, I was trying to do later, but for now just take it as a given.)
The most important step is to have Swift installed on your machine. As a Mac user, the easiest way is probably just to install Xcode, but if you’re looking for a lighter-weight solution, you can install just the Swift toolchain. Swift is also available for Ubuntu, which, again, takes some doing. If you want Swift on Windows… well, it’s an ongoing project. Personally, I’d say you’ll probably have better luck running it in Ubuntu on the WSL.
Alright, got your Swift installation working? Let’s go.
Step 1: Make your Swift file. We’ll call it main.swift, and in true Tech Tutorial fashion, we’ll keep it simple:

print("Hello world!")

Step 2: Insert a Magic Comment in the first line:

#!/usr/env/swift
print("Hello world!")

Step 3: In your shell of choice, make it executable:

$ chmod +x ./main.swift

Step 4: Run!

$ ./main.swift
> Hello world!

No, really, it’s that simple. The magic comment there tells your interpreter ‘run this using Swift’, and then Swift just… executes your code from top to bottom. And it doesn’t have to be just function calls — you can define classes, structs, enums, whatever. Which is the real benefit to using Swift instead of just writing your script in Bash; object-oriented programming and type safety are lovely, lovely things.

My next post is going to go into some of the more interesting stuff you can do, with a lovely worked example, but for now I’ll add a couple other things:

  • By default, execution ends when it gets to the end of the file; at that point, it will exit with code 0, so Bash (or whatever) will assume it worked correctly. If you want to exit earlier, call exit(_:) with the code you want. exit(0) means “done successfully,” while any other integer in there will be treated as an error.1
  • print(_:) outputs to stdout, which can be piped using |. If you want to output an error (to be piped with 2>, or similar) you need to import Foundation, and then call FileHandle.standardError.write(_:).2
  • To explicitly write to stdout, it’s FileHandle.standardOutput.write(_:).

  1. Which is useful if your script is going to be called programmatically. ./main.swift && echo "It worked!" will print “Hello world” and then “It worked!” with exit(0), but just “Hello world” if you add exit(1) to the end of the file. 
  2. And note the types here – this expects Data, not String, so to write a string, you need to convert it by adding .data(using: .utf8)! 
Categories
Programming Technology

Publishing a Private Angular Library via Git

So, you’ve built yourself a nice new Angular library and you’re excited to put it to use in your apps! It’s an exciting time. But wait: the code you used is proprietary, and you can’t upload it to NPM.1
Good news: thanks to some features of Git, NPM, and most Git hosts, there’s a way to bypass NPM, and you don’t even need to set up your own repository. Sound good? Let’s go.
Now, I’m assuming that you’ve already (a) created your Angular library, and (b) have it in Git. If you haven’t done (a), there’s a pretty good guide on Angular’s site; if you haven’t done (b), allow me to evangelize source control to you: Git is awesome, and you should be using it. This book, available online for free, is an excellent getting-started guide.
So, you’ve got a version-controlled library; how do we make it available?
1. Build the library. ng build {YourLibrary} spits out your library as a ready-made NPM package.
2. Track the built files. git add dist/{your-library}. If you’ve got that in your .gitignore, you’ll need to remove it, or git add -f. I’d recommend the former; you’ll need to do this every time you update the library. Wrap it up with git commit and a nice message explaining what you’ve changed.
3. Set up a second repository. This is where the NPM package version of your repository will live. Leave it empty; we’ll push to it in a moment.
4. Push the subtree. This is the the magic part: we’re going to treat the built files as their own separate repository. git subtree push --prefix dist/{your-library} {path to the second repository}2
5. Tag the release with a semantic version number.3 While it’s possible to do this via the command line, it’s not fun, so I’d recommend using the GUI for your Git host of choice.
6. Generate a read-only token for the second repository. In GitLab, this is under Settings > Repository > Deploy Tokens. Configure it as you’d like, but be sure to enable read_repository.
7. Add the library to your app’s package.json. Give it the Git address for your second repository, and follow it up with either a tag or branch name to pull from. (For example: "your-library": "git+https://{GitLab token username}:{GitLab token password}@gitlab.com/{your username}/{your-second-repo}#master would pull the latest version from master.)

Et voilà; you’ve got a private Angular library, ready for use.


  1. Or maybe you’ve got issues with the fact that NPM is a private company, and can remove, un-delete, or hand over your packages without your permission
  2. i.e.: git subtree push --prefix dist/my-own-library https://github.com/grey280/my-own-library.git 
  3. This isn’t strictly necessary – I’ll explain a bit more in step 7.